Showing posts with label Decoration. Show all posts

Home Sweet Chicago

We were back home in Chicago last week for some R&R! We went boating, fishing, visiting friends and family, swimming, and even ran a 5K which was neither resting or relaxing! While I was there I was left alone in the house. Ut-Oh. I decided to take this lamp which was fine and give it a spin much like this lamp from Lemon Tree Creations.


I sprayed in bright red over the raffia let it dry. I was already thinking it was a bit too red and when my sister came home she agreed. (It was for her bedroom which has dark gray walls and a cream and red duvet.) So I took off all the raffia and sprayed the whole thing red hoping to switch the stripes and main color. Stripes red and the body Rustoleums Heirloom White. Well, we never made it back to the store to get the Heirloom White so this is how the lamp looks right now in the garage.

Now the tutorial on how to do this lamp is right here. So it would be pretty easy for my sister to finish this lamp right? I wonder if she will do it? I think she should. I know you are reading this STOP reading and go finish it. Please take a picture too so I can put it up on this here blog! Thanks much!


In other projects, I did manage to start and finish recovering this glider for my mom. She had bought fabric when she in was Denver on New Years Day, at a huge sale where I bought quite a few good yards myself! When I saw it folded nicely, untouched I decided to 1. find the sewing machine 2. use it! 3. recover the glider for my dear, sweet mommy!


I did this glider exactly how I did the glider in our nursery... like pillow cases. The bottom/back of each cushion is not closed. I made a finished edge for each but didn't worry about velcro, buttons, or snaps. With each cushion pushed back you can't tell and it made recovering the glider a breeze easy, sleazy!


So we aren't even unpacked yet which is a good thing and on purpose because we leave for Washington DC and NYC on Saturday! I have been reading Fodor's NYC with kids and I am pretty nervous about "gypsy" cabs! Look for the medallion, look for the medallion, don't get into a cab with out the medallion.
Posted by Picasa

Week 18: Front Porch Chairs

I am totally over "matchy matchy" and our front porch chairs were exactly that. The perfect beige to match the beige trim on our house. This winter I decided that I wanted to spray paint the chair to add some color. But then I was thinking that I should just make a slipcover for the chairs to add some BOLD color to our curb appeal.


I was all over the place at Joanns trying to pick a good outdoor fabric. I didn't want to regret my decision and pick a "safe" color scheme. I had some bright blues in my cart for a while but ultimately choose these two fabrics. I love the branches and the birds. The pillow in the contrasting color I love it. It seems to calm down the bright coral a bit. I did lay each of the fabrics over my two chairs and was leaning toward the circle fabric in the slipcover but in the end went with my original plan and as of right now I have no regrets. Until the HOA says something to us!!!


So here is the chair in all her glory. The best part is that I have them attached with ties so I can take them off and wash them as needed. There is a second chair and it is on the front porch as well but I am too embarrassed to show a full picture of the front of our house until I get some flowers planted. Look at our grass, thank goodness we got the sprinklers turned on last week! A full curb appeal picture will be coming soon!

Posted by Picasa

April Hutch...


Well this month's hutch was a big failure! I am embarrassed to even show it but hopefully the embarrassment will help me get my act together for next April. I had originally planned on doing the hutch in pastels, for Easter of course, but then I started getting excited about yellow. So I made a last minute switch and couldn't get it together. I knew that we were not hosting Easter so I didn't put any pressure on myself to compete it. I did however manage to make the yellow balls out of yarn, a balloon, and Elmer's glue. They look cute and will resurface when I attempt yellow again. Sorry April.

Posted by Picasa

Week 9: Table Cloth

Andy and I first saw this fabric in the Special Order section at Joann's. It was $19.99/yd and at the time we weren't quite sure where it would fit in our house. So we returned the sample piece to Joann's for the time being and kept it in the back of our heads. Then one day I was at Denver Fabrics (awesome!) and saw the same fabric and it was... wait for it.... $9.99/yd and in stock so I snatched it up.


We had previously decided it would be the fabric for our table cloth. With black chairs and the hutch behind the table this fabric helped pull the room together. Even though I didn't need to cut the cloth I still needed to finished the edges. Generally, I would instantly go to the sewing machine but I decided against it for the table cloth. I was worried that on this large of fabric I wouldn't be able to keep a straight line.

Instead, I decided to use iron-on bonding to attach 1 1/2" black binding. It took a little bit of time but was extremely easy to do. After I had the binding attached I did go over with my machine and black thread just to make sure that it was secure.

Ready for her close up!!!
Posted by Picasa

February Hutch

Posted by Picasa

February is a distant memory but I still wanted to post the hutch for the month. I went with the obvious choice, red and pink. I had an old shutter that I got a couple of years ago at an antique store in New Mexico, so I added that for the month. The cute little bird on the shutter is from Hobby Lobby. The kissing balls and red frames I made for cheap and easy. Most of the glassware came from Goodwill that I got over time in anticipation of my February hutch. Next up, March!

Week 7: Corner Chair

I bought this chair in the fall at Goodwill, it was love at first sight! I think it was about $40.00 and I instantly envisioned it paint black with a black and white scroll fabric. There was a slight problem though... I didn't know where it would go. So it sat in the garage, it sat in the basement, just like our bed frame bench... seeing a pattern?

We decided that it should go in the living room for additional seating. And as lovely as the red velvet is, we chose to pick a different look. So I took the chair apart all the way to the frame. It was pretty dusty and gross and there TONS of upholstery nails. I recovered the chair and spray painted the frame gray.

We were debating between a gray scroll print and a yellow and gray which was somewhat retro. It took a few weeks to decide but we finally settled on the gray and yellow retro. When up against the wall the yellow looks like the same green as the wall color. The extra seating is awesome and the family room is quickly "filling" up with furniture.
 
Thank you Goodwill!
Posted by Picasa

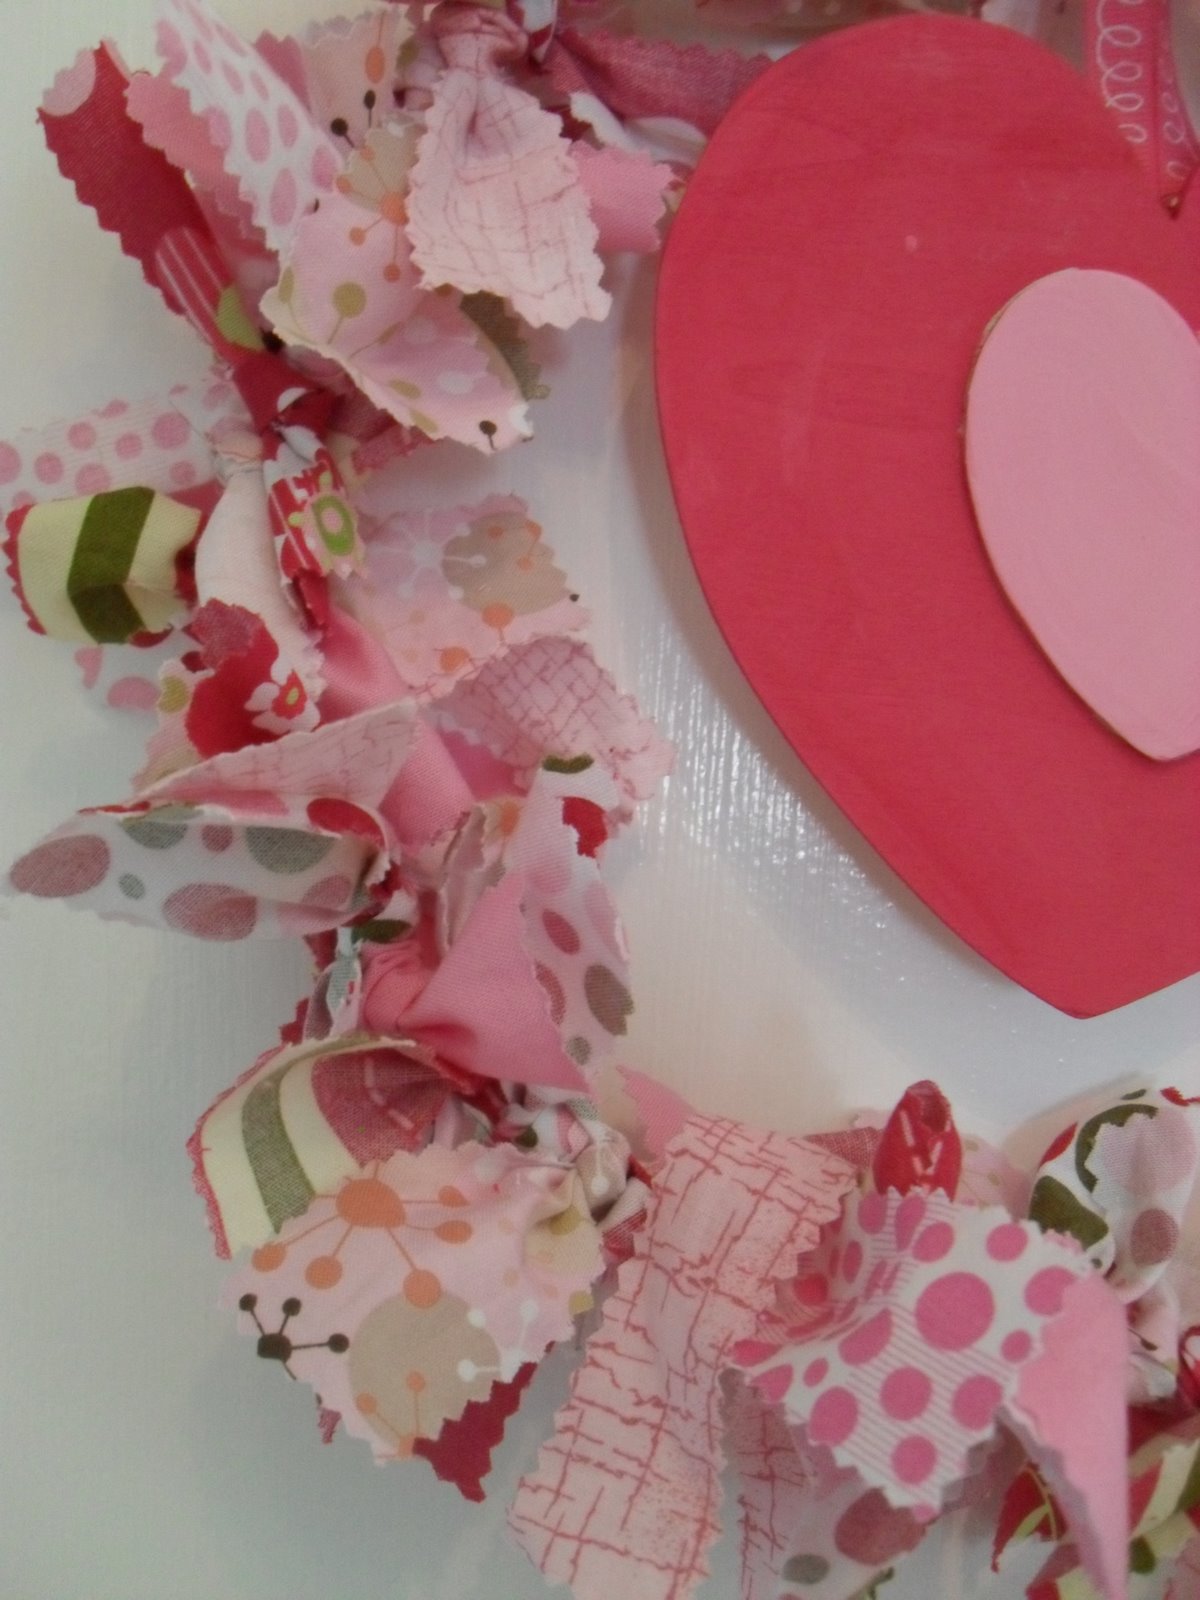
Valentines: Indoor Fabric Scrap Wreath

I don't even know who to give credit to for this idea. My sleep deprived mind didn't dream it up but someone in blog land did and it seemed easy enough so I decided to give it a go.

I took a look through my scrap bag and pulled out all the fabric that had shades of pink. I cut each piece, with shears, into a 6-7" rectangle. Once I had a good start I took a wire hanger and with wire cutters cut off the hook and twisted the ends together. Then I started tying each fabric on the hanger. Surprising myself I didn't do a pattern I just made sure that any of the bold pinks or the pink with green we not right next to each other. I think it turned out pretty cute and it was super easy! I am debating to do another one, green, for St. Patricks Day!

Posted by Picasa

January Hutch

This is not a project that counts towards my 52 but every month I plan on decorating this flea market find aka the hutch (which didn't look like this when we got it) in a specific color. Overall, I am happy with the blue for January but I need to be on the lookout for additional items when I am at the thrift stores. I made the coffee filter wreath at the beginning of the month from a tutorial at The Nester and added the blue ribbon with upholstery tacks. I plan on keeping that there all the time and changing the ribbon for the month.

The hutch I found at the Mile High Flea Market. The day I went there I was on the lookout for old cabinets that could become a build in under the window with a half table. I was not finding anything when I saw this old, ugly hutch. I think it was the topper of a buffet but the bottom was perfect and it could stand on its own. We, General Contractor, sanded it down and painted it black with oil based paint. I found scrapbook paper and matching knobs at Hobby Lobby. I used spray adhesive to attach the paper. I didn't use Mod Podge on top because I didn't want it shiny. So we have to be careful with what we put close to the paper but I am okay with that, it is a display piece to us. The second it came in I feel in love with the look. Not bad for a total of $50 (hutch and materials included!)
Posted by Picasa

Valentines: Front Door Addition

I thought my pink beads addition was pretty cute for the wreath at my front door. But then I saw a tutorial for a Kissing Ball and I had to make a few.
They look a little like lollipops. And I am thinking that trimming the dowel rod down may lower the lollipop factor or getting some moss too. I am heading to Hobby Lobby and Michaels after dinner... moms only! And may pick up some moss while I am there.
There is one more part to my Valentines front door that I have to finish start but the weather needs to get a bit warmer to break out the spray paint. I checked the 10 day forecast and this weekend looks promising.
Posted by Picasa

Valentines: Adding a Bit of Pink

I made this wreath about two years at "craft night" with some girlfriends. It was up for a while then we took it down. I just hung it back up when the holiday decorations came down. I thought it was "good enough" for winter even though it spots were bare. Then I was at the Dollar Store the other day and found material as the white but in pink. (I said material because I have no idea what to call these twig like things with "berries" on them. I bought two bundles. With wire cutters I cut each one individually and stuck them in. After looking at the picture I am thinking about taking it down completely and redoing in pretty much the same but adding glue to spots with the glue gun. We will see how the weekend develops.
Posted by Picasa